Introduction
The goal of this article is for you to spend 10 minutes here and end up understanding how to build your first AI agent.
If you've been scrolling through tech blogs and reels lately, you've probably heard the term "Agent" for a while now.
There are various tutorials that will help you build an agent. But the problem with most is that they end up building sophisticated chatbots, which technically aren't agents. Then there are those who build an agent but don't really explain what's happening behind the scenes. Also, I have seen tutorials where most of the work is done using hardcoded data. And that's not exactly what an agent is expected to do. An agent has to be real-time and think dynamically.
So, in this guide, we are going to build a very simple AI agent in about 10 minutes. We're going to write a straightforward Python script, give the agent a real capability, and actually understand what's happening behind the scenes.
What is an AI Agent?
Let's get on the same page before building an agent.
So you need to first understand the difference between a chatbot and an agent. A chatbot is designed to answer questions and hold conversations. When you ask it a question, the chatbot uses the knowledge it learned during training and any additional context you provided to generate a response. Its job is to produce text. It can't perform any action.
An AI agent goes a step further. Instead of just answering your question, it can also take action. It can create a plan, use external tools, gather information, and complete tasks on your behalf.
An AI Agent is the same brain as a chatbot, along with the hands to perform actions.
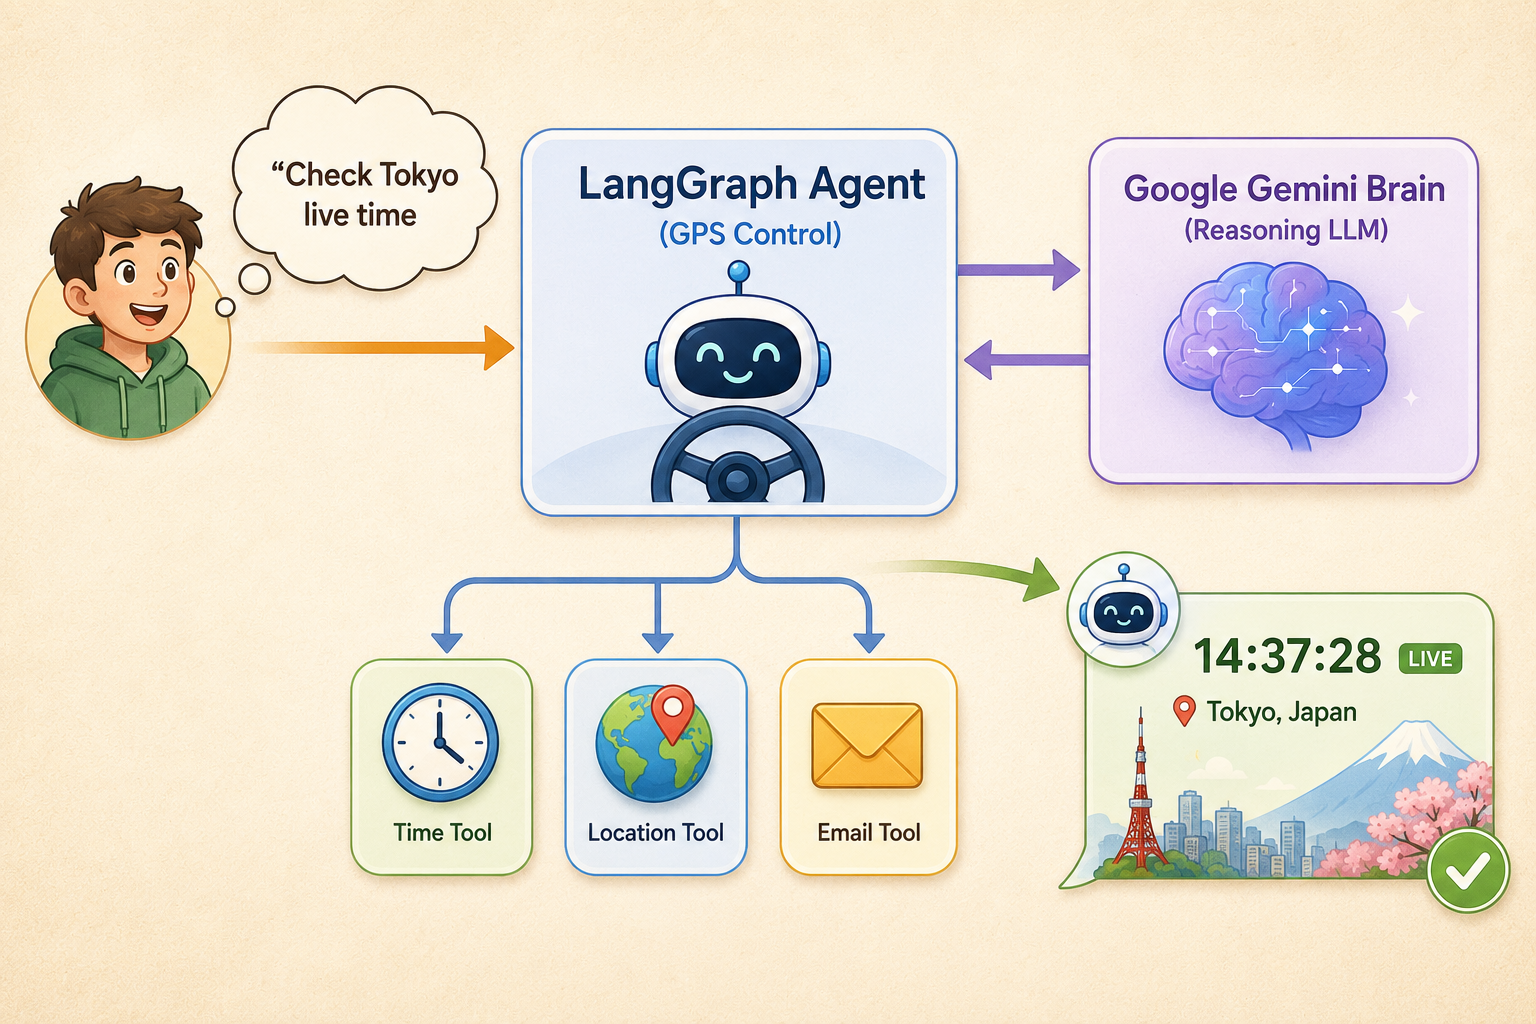
In simple terms, we provide the LLM (Large Language Model) with Tools (hands), which are standard Python functions we write. The LLM is the brain that shall act as a reasoning engine. This means that when you ask the agent a question, it thinks, realizes it doesn't know the exact answer, and decides to run your Python function to find out.
In short, a chatbot talks, while an agent acts.
The Setup
There are various ways to build an agent. For this one, we are going to use LangGraph, which is an industry standard for building robust and controllable agents. It provides enough transparency into the agent's logic while being very simple to begin with.
You’ll need Python (3.10 or above) installed, and you’ll need to install a few packages. Don't panic if you are doing this for the first time. Just open your terminal or command prompt, copy-paste the following line, and hit enter:
pip install -U langchain-google-genai langgraph pytz python-dotenv
You'll also need an API key for Google Gemini, which you can get for free from Google AI Studio.
Instead of manually pasting your api key every time, create a file named .env in your project folder and add this line:
GOOGLE_API_KEY="your_api_key_here"
Pro-Tip: Just ensure that your computer doesn't accidentally save it as .env.txt. The file name must be exactly .env with nothing before the dot.
The Build
It's time to work on the magic. We'll write some simple code to build an agent. Just follow along by copying the code snippets, and I'll explain what each part does in a simple way so you can understand the logic behind it.
We'll build everything step by step in three simple stages:
-
Giving the agent hands
-
Giving the agent a brain
-
Combine them. Create a file called agent.py and follow along.
1. Give it Hands (The Tool)
For the agent to come to life, we need tools with which to perform actions. We’re going to build a dynamic time zone checker that uses Python's built-in datetime library to fetch real-time data.
import datetime
import pytz
from dotenv import load_dotenv
from langchain_core.tools import tool
from langchain_google_genai import ChatGoogleGenerativeAI
from langgraph.prebuilt import create_react_agent
load_dotenv()
@tool
def get_current_time(timezone: str) -> str:
"""Returns the current real time for a given timezone (e.g., 'Asia/Tokyo')."""
tz = pytz.timezone(timezone)
return datetime.datetime.now(tz).strftime("%Y-%m-%d %H:%M:%S")
tools = [get_current_time]
What is happening here?
-
load_dotenv(): This line catches the Google API key from your .env file. It keeps your key safe from getting uploaded on the internet.
-
@tool: This is a Python decorator. Imagine it as a sticky note you put on a function that tells LangGraph, "Hey, the AI is allowed to use this!"
-
The Docstring ("""Returns the..."""): This one is one of the most crucial lines. Here, the AI reads this exact sentence to understand what the tool does. If you write a bad description, the agent won't know when to use it.
-
tools = [get_current_time]: It's about packaging our tool into a list, so we can give it to the AI later.
2. Give it a Brain (The LLM)
It's time to add the brain now. Adding a brain means bringing in the reasoning engine. We’ll use Gemini 2.5 Flash as the LLM because it's super fast, lightweight, and optimized for calling tools.
It's just a line of code:
llm = ChatGoogleGenerativeAI(model="gemini-2.5-flash")
What is happening here?
- ChatGoogleGenerativeAI: This line builds a direct pipeline to Google's servers. We are storing the brain in a variable called llm so we can plug it into our agent in the next step.
3. Combine Them Together
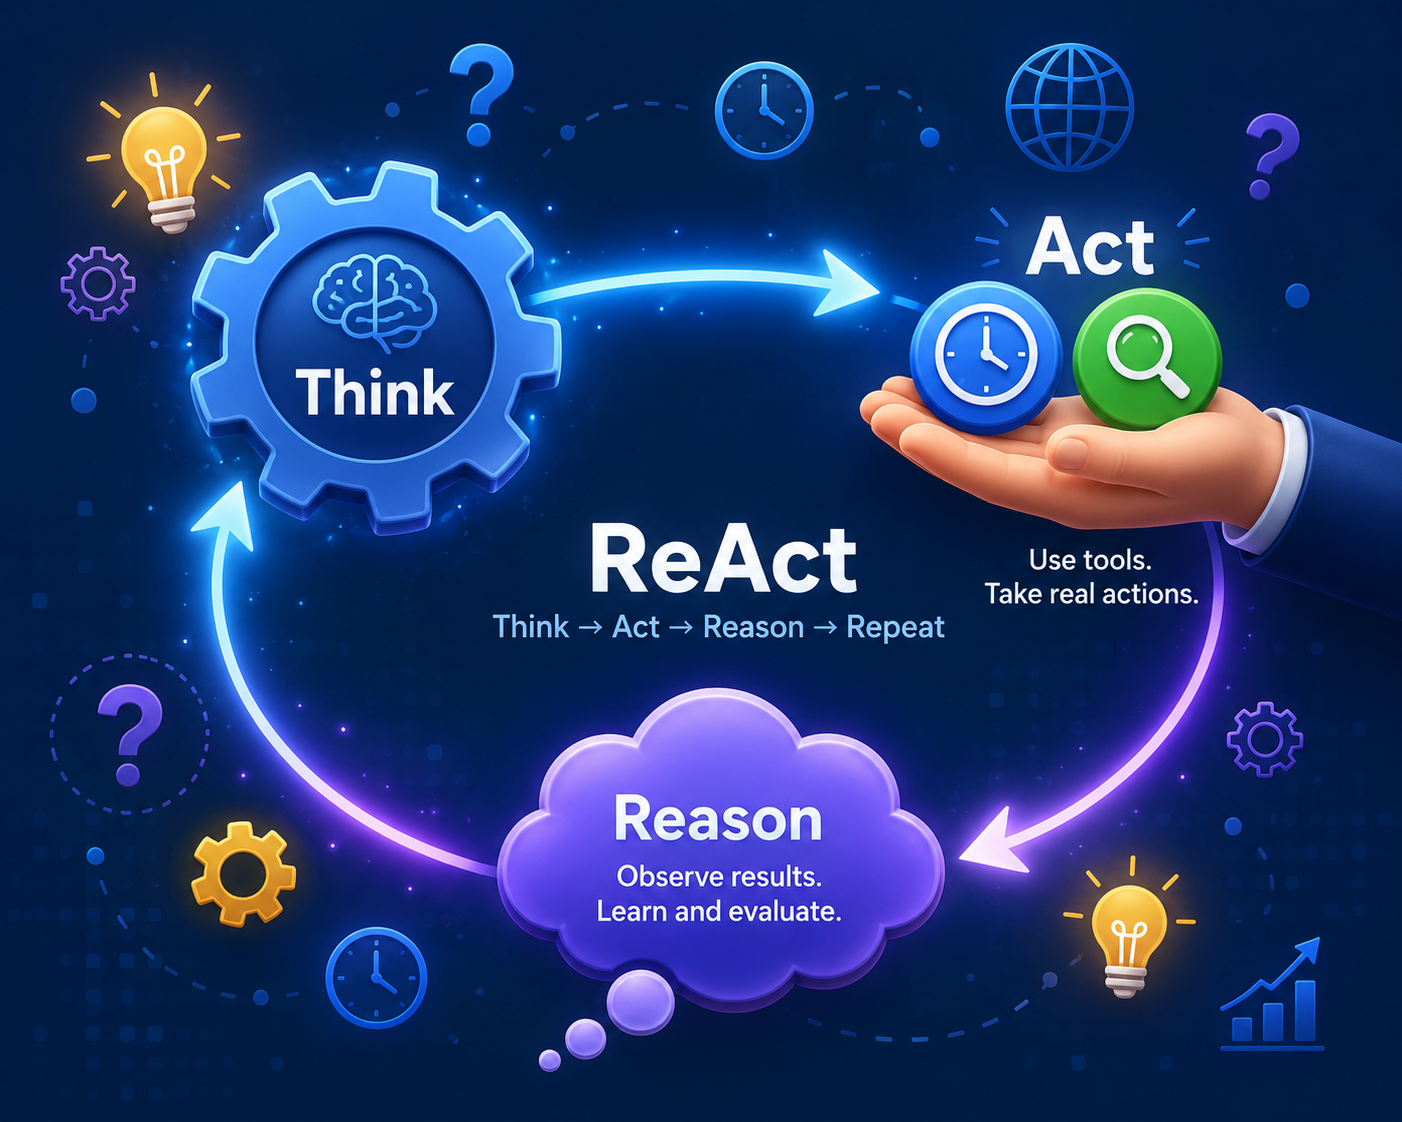
It's time for LangGraph to shine. We need not write tons of lines of complex logic to make the LLM talk to the tool. Instead, we use a prebuilt ReAct Agent.
Again, it's just a single line of code.
agent_executor = create_react_agent(llm, tools)
What is happening here?
- create_react_agent: ReAct stands for Reasoning and Acting. This single line allows the connection between our LLM (the brain) and our tools (the hands). It sets up an infinite loop that works like this: LLM thinks, calls a tool, reads the output, and then makes up a final answer to give back to you.
That's it! You now have an agent ready. Let's test it.
4. Test
For testing, let’s ask a question that a standard LLM won't be able to answer accurately without using a tool. Add this towards the end of your code and run it.
response = agent_executor.invoke({
"messages": [("user", "What is the exact time in Tokyo right now?")]
})
print(response["messages"][-1].content)
What is happening here?
-
.invoke(...): This is how we kickstart the agent. We pass in a list of messages from the user, which in this case is you.
-
response["messages"][-1].content: The agent does a lot of thinking behind the scenes. This eventually generates a long list of message data. So, this line simply tells Python: "Go to the very last message in the list, which is the agent's final answer, and just print that text."
Output:

Conclusion
You just built a real AI agent!
Now, if you observe, the magic isn't actually in the AI. Yes, the AI (LLM) is the brain, but the magic is in the tools you give it.
Right now, your agent only has one tool. It's the ability to check the time. But what if you wrote a Python function that searches the web? Or a function that reads your emails? There are so many possibilities, and that's what makes this area so exciting.
By adding a new @tool to your code and providing it to the LLM, you give your agent a brand-new superpower. Yes, the brain stays the same, but the hands can perform any action that you wish.
Frequently Asked Questions
1. Is the Google Gemini API key really free?
Yes! Google AI Studio offers a free tier, making it ideal for learning and personal projects. However, the free tier has rate limits, model restrictions, and some advanced models/features require a paid tier. You won't be charged unless you specifically set up a paid billing account.
2. What exactly is LangGraph, and why are we using it?
LangGraph can be thought of as the GPS or the flight controller for your AI agent. Standard AI models can only move forward in a straight line. Meaning you pass in text, and the output is text.
But an agent needs to move in a loop. A loop where it needs to think, take an action (use a tool), look at the results, and then think again. LangGraph is a specialized framework that manages this loop for you behind the scenes.
3. I tried to run it, but I got an error saying "ModuleNotFoundError". What went wrong?
This means Python can't find the packages we tried to install. Ensure that you have successfully run the pip install command from the Setup section. If you have both Python 2 and Python 3 installed on your computer, you might need to use pip3 install instead of pip install.
4. Can I use a different AI model, like ChatGPT or Claude, instead of Gemini?
Yes, you can. That is the beauty of LangGraph. You can literally swap out the brain (AI model) with hardly any changes to the rest of your code. If you want to switch to a different model, such as one from OpenAI or Anthropic, install the appropriate package, get their API key, import the new model, and update the model name in the brain section.