

Want to try DLSS 5 Neural Rendering in a game that does not officially support it? DLSS5-Swapper simplifies the process by handling the required file changes, add-ons and backups for compatible games.
Because it is a community-built tool, results vary depending on the game, GPU and driver. Neural Rendering primarily changes lighting and material rendering, so higher frame rates are not guaranteed. In this article, we walk through downloading DLSS5-Swapper, and adding DLSS 5 on the game of your choice.
Prerequisite
You need Windows 10 or 11, 64-bit. The project lists RTX 20, 30, 40 and 50 cards for its ReShade and Feeder routes, with older-card support attributed to a modified runtime. This is community compatibility, not an NVIDIA support guarantee. Feeder also needs the Visual C++ runtime: x64, plus x86 for 32-bit games.
Get the Visual C++ Redistributables from Microsoft
Start with an offline, single-player game. Anti-cheat can reject injected files or cause account bans. Close the game and keep a separate backup of existing mods and files before any changes.
1. Download the Windows build
Open the latest GitHub release and expand Assets. Download DLSS5-Swapper-Setup-2.2.4.exe for the installer.
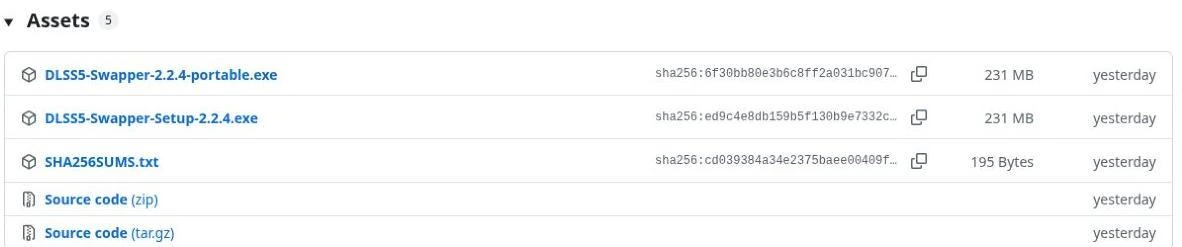
The release Assets list contains both Windows builds and SHA256SUMS.txt.
2. Open DLSS5 Swapper
For the installer build, run the downloaded Setup file and follow its prompts, then open DLSS5 Swapper. For the portable build, keep the downloaded executable in a folder you can find and open it directly. Both lead to the same tool.
If you want to check the download, compare its SHA-256 hash with SHA256SUMS.txt from that release. A matching hash confirms the file matches the published download; it is not a malware verdict. Investigate any security alert before continuing.
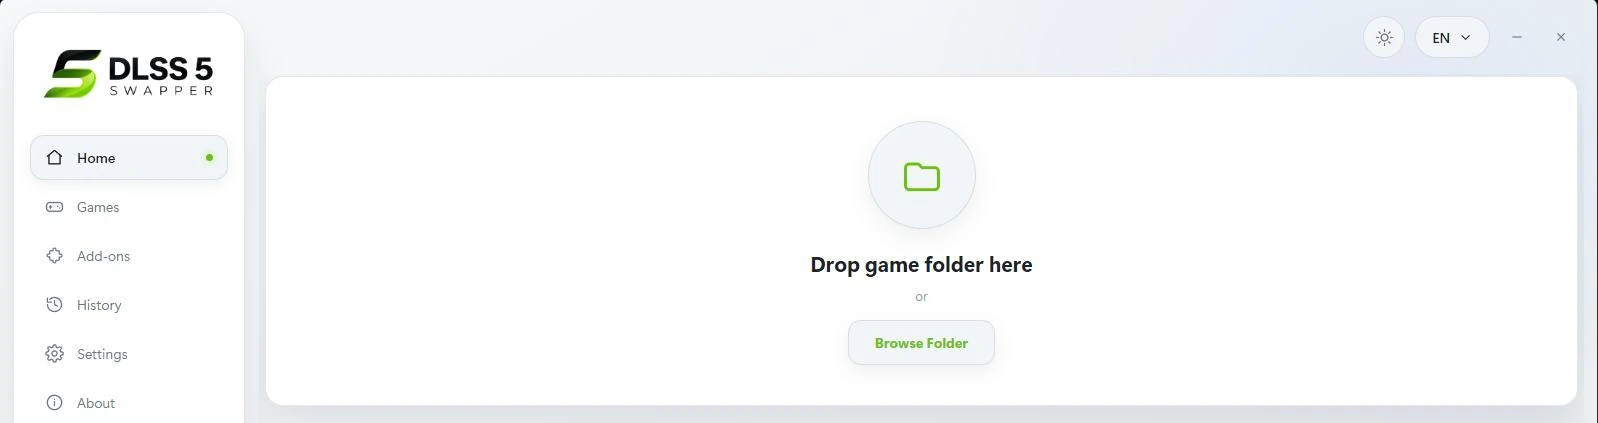
The Home screen provides Browse Folder and a drag-and-drop area.
3. Find and select your game
Open Games and search for the title. If it is missing, use Add a folder to scan its location, or return to Home and click Browse Folder. You can also drag the installed game folder onto Home. Select the installed game directory, not the folder containing its setup files.
Click the game card to open its details. Check the executable and detected Rendering API. If the folder contains a launcher and the actual game, choose the game executable. Leave the API on Automatic unless you know the game is using a different renderer.
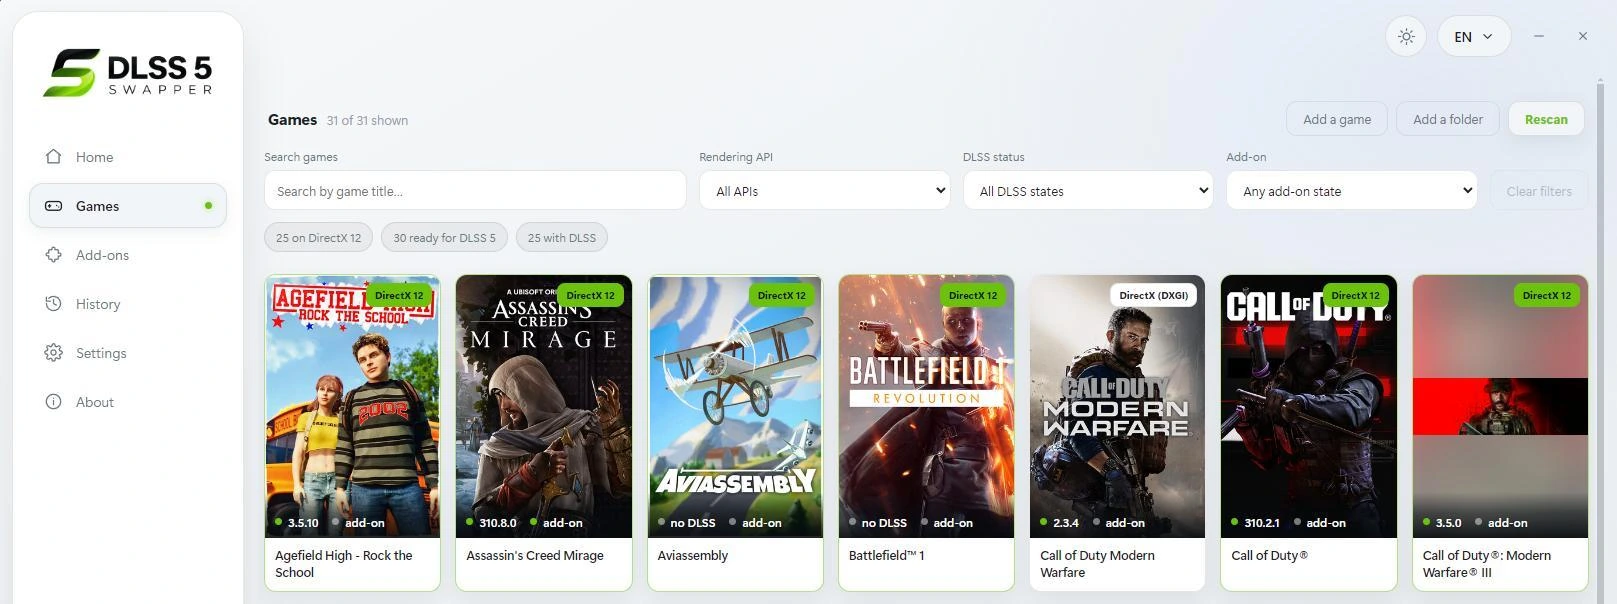
Games includes title search, filters, Add a game, Add a folder and Rescan.
4. Choose the installation route
For a first attempt, keep Rendering backend on ReShade (default) and review the preselected Installation route. The choices depend on the detected game and API. Native DLSS (RenoDX) uses an existing compatible DLSS path; DLSS5-Feeder is the alternative for games without compatible DLSS.
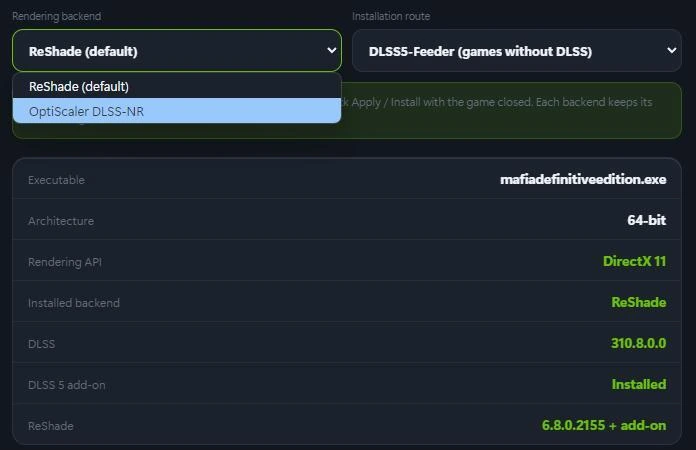
The game details panel separates the rendering backend from the installation route. Older official screenshot, cropped; current builds also offer an API override.
| Your game or setup | Route to check |
|---|---|
| A compatible game with native DLSS | ReShade with Native DLSS (RenoDX) |
| No compatible native DLSS, or an emulator | ReShade with DLSS5-Feeder |
| An eligible 64-bit native-DLSS game and suitable hardware | Optional OptiScaler DLSS-NR backend |
OptiScaler is optional. Its bundled neural model requires Blackwell hardware, such as an RTX 50-series card; an older card needs a compatible modified nvngx_dlssnr.dll supplied separately. It is not the route for emulators or games without a native DLSS pipeline. Keep DLSS enabled in the game when using it.
For a first setup, use a supported DX11 or DX12 mode where available. Feeder does not directly support DX10. Changing the API selection in Swapper must match the mode the game actually runs.
5. Install the files and optional overlay
If you want Swapper’s in-game controls, first open Overlay and enable Install overlay with DLSS. Choose a theme and note the displayed hotkey. The current documented default is F8; the older screenshot below shows a different configured key. The desktop preview only previews the panel’s design.
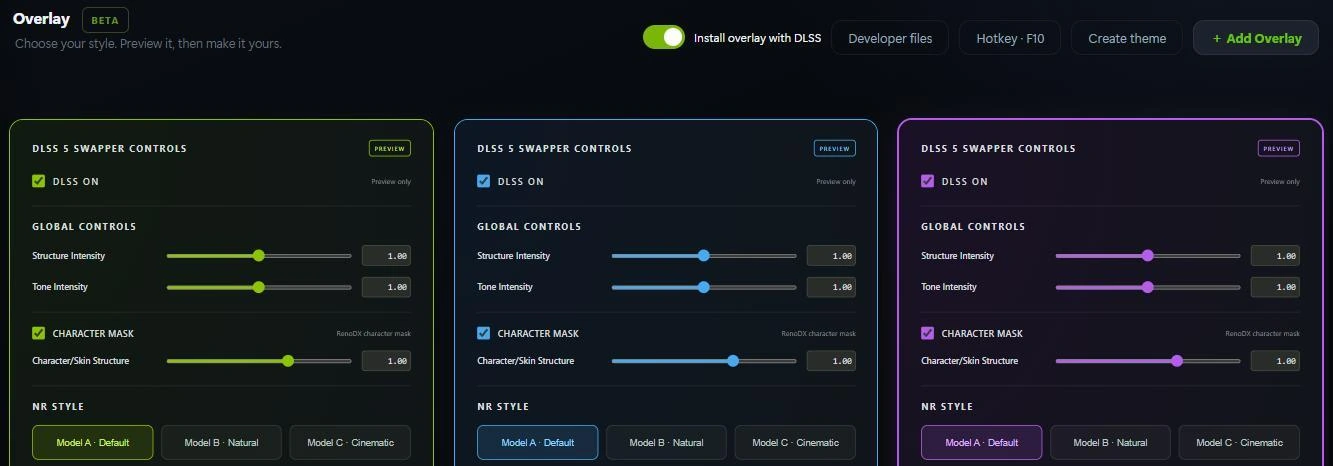
Overlay settings include the install switch and hotkey.
Return to the game details and click Install DLSS 5. An existing installation may instead show Apply backend change; the OptiScaler route has its own install label. Read any game-specific notes before proceeding, and keep the game closed while files are changed.
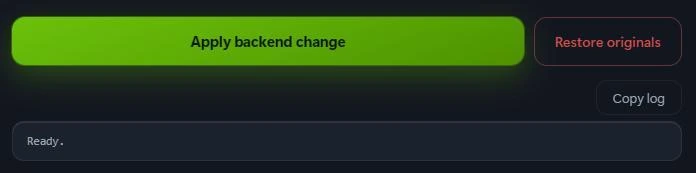
The action button and installation log sit at the bottom of the game panel. This older official screenshot shows an existing installation with a pending backend change.
Allow any required component downloads to finish, then check the installation log and refreshed component status for errors. Preserve the _DLSS5_Backup folder. Keep Swapper open if you plan to use its overlay.
The Swapper overlay requires a compatible 64-bit DX11 or DX12 game and the Feeder or RenoDX v4.7 route. An overlay being skipped does not necessarily mean the underlying DLSS installation failed.
6. Launch the game and adjust the effect
Start the game normally and load a scene. If you chose Native DLSS or OptiScaler, enable DLSS in the game’s graphics settings so the route receives the inputs it needs. A Feeder installation does not require the game to have its own DLSS option.
For a supported Swapper overlay installation, press F8 or your configured hotkey. If you are using ReShade’s interface, open it with Home, or the key shown in its startup banner, and select Add-ons. Look for the installed DLSS Neural Rendering or RenoDX add-on and check its status.
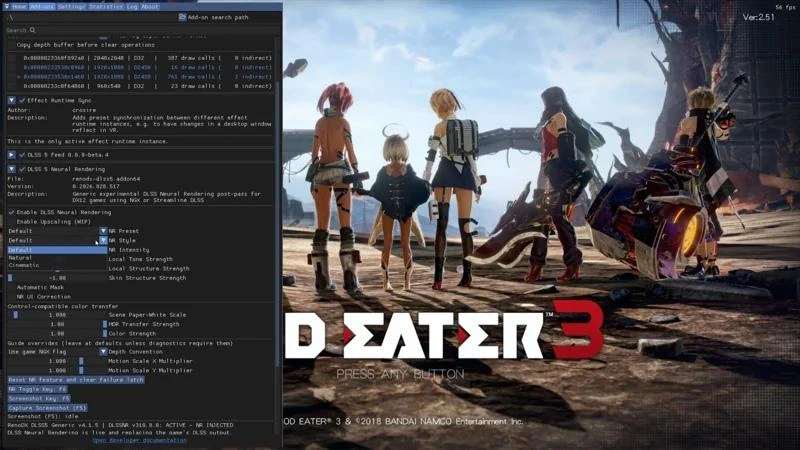
ReShade’s Add-ons tab in God Eater 3, with Enable DLSS Neural Rendering and the NR Style menu visible.
Enable DLSS Neural Rendering if the control is available and unchecked. Start with the default style and settings. Once the add-on reports that it is active, compare the same scene with the effect enabled and disabled. Seeing an overlay alone does not prove that the neural effect is running.
Try Default, Natural and Cinematic under NR Style where offered. Change one intensity or structure control at a time, then look at faces, fine textures and the HUD while moving the camera. If the result looks unstable or costs too much performance, reduce the effect or turn it off.
On the native route, an empty ReShade effects list or “No effects found” message alone is not a failure: this route uses Add-ons. If the game still shows no effect, return to Swapper and inspect the logs before reinstalling.
Restore the original game files
In case you want to revert back to the original game state/
Close the game. In Games, right-click its card and choose Restore originals, then confirm the restore. The same action is available in the game details panel. Swapper removes the files it installed and puts backed-up originals back.
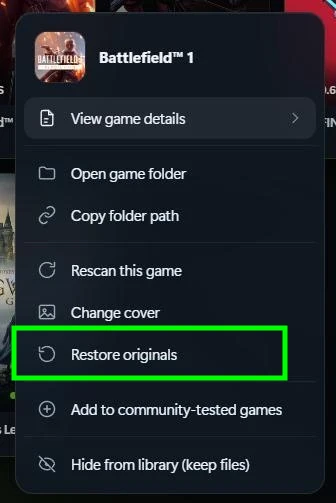
Restore originals in the Games context menu.
Wait for the operation to finish and launch the game again. Do not delete the backup folder first. If the backup is incomplete, read the log and repair the game through its launcher when the original files are lost. Hiding a game from the list does not uninstall anything.
Quick fixes for common problems
The game does not appear
Add its folder manually and click Rescan. Full-drive scanning is off by default. If filters are active, clear them before searching again.
The overlay never connects
Keep Swapper open, check the configured hotkey and read the Overlay page status. Version 2.2.4 can identify a missing or quarantined overlay add-on. Review the reported file and security alert instead of repeatedly reinstalling.
The installation fails or the game crashes
Check the driver, executable and rendering API, then review existing graphics mods for conflicts. Use Save diagnostics to collect the available logs, review the contents, and keep the file for troubleshooting. Restore originals before trying another Vulkan backend.